
Within the past couple months I have started to participate in button swaps. I have had some success and some failures in creating buttons that fit my criteria. Here are a few things to look for when making a button:
1. Don't let your button get lost in the crowd. This happened on my first buttons swap. I sent off my button and got an email back saying that she had put it up on her site. I was so excited that I immediately went to her site to see it. I couldn't find it! I must have looked up and down the column five or six times before I finally found it smack dab in the middle.
2. Keep it simple. In the button world, less is more! Buttons are very tiny, if you put too much on it people won't know what is going on!
3. Make it interesting. It's almost like a miniature work of art!
4. Make it you. I don't know how many times I have clicked on a button and it have nothing to do with the blog at all. Make sure that your button matches your content, which should match you.
So now that you know what to do, lets talk about how to do it!


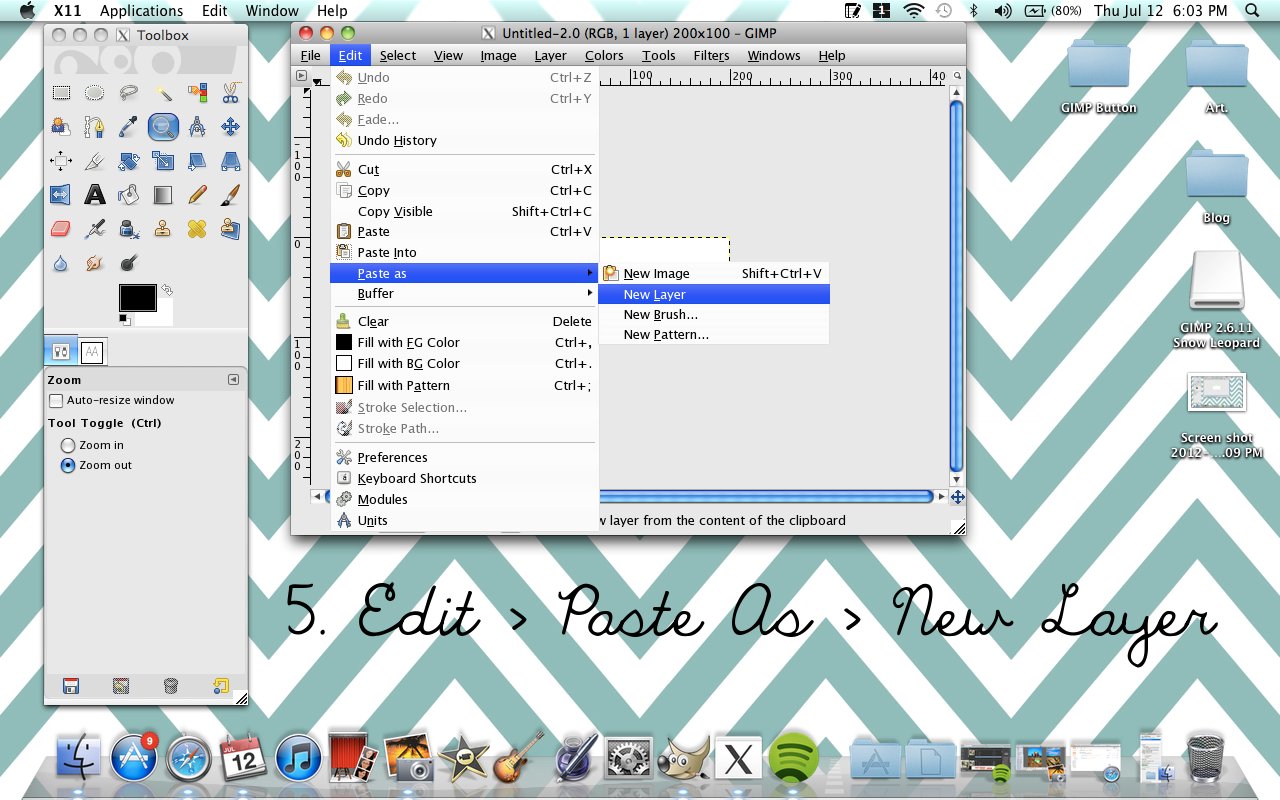


If you don't know how to add text. Click HERE!


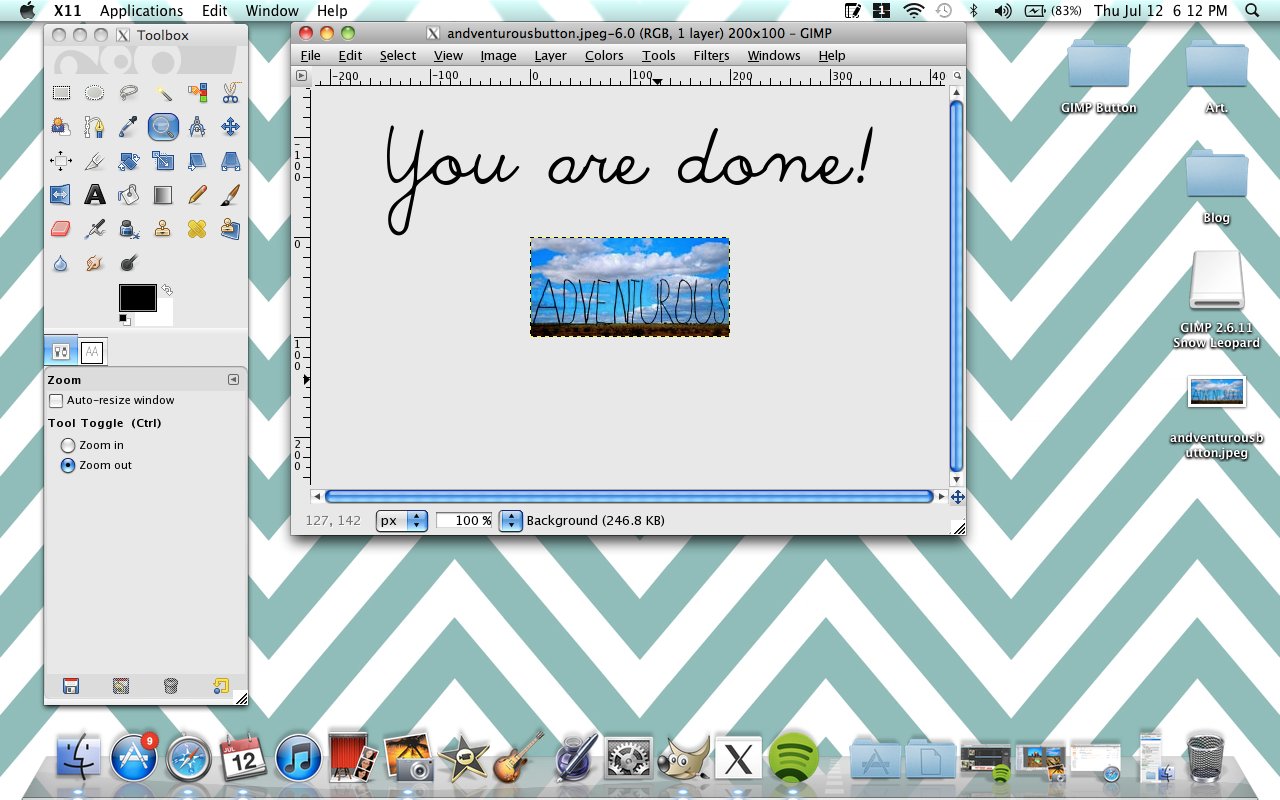
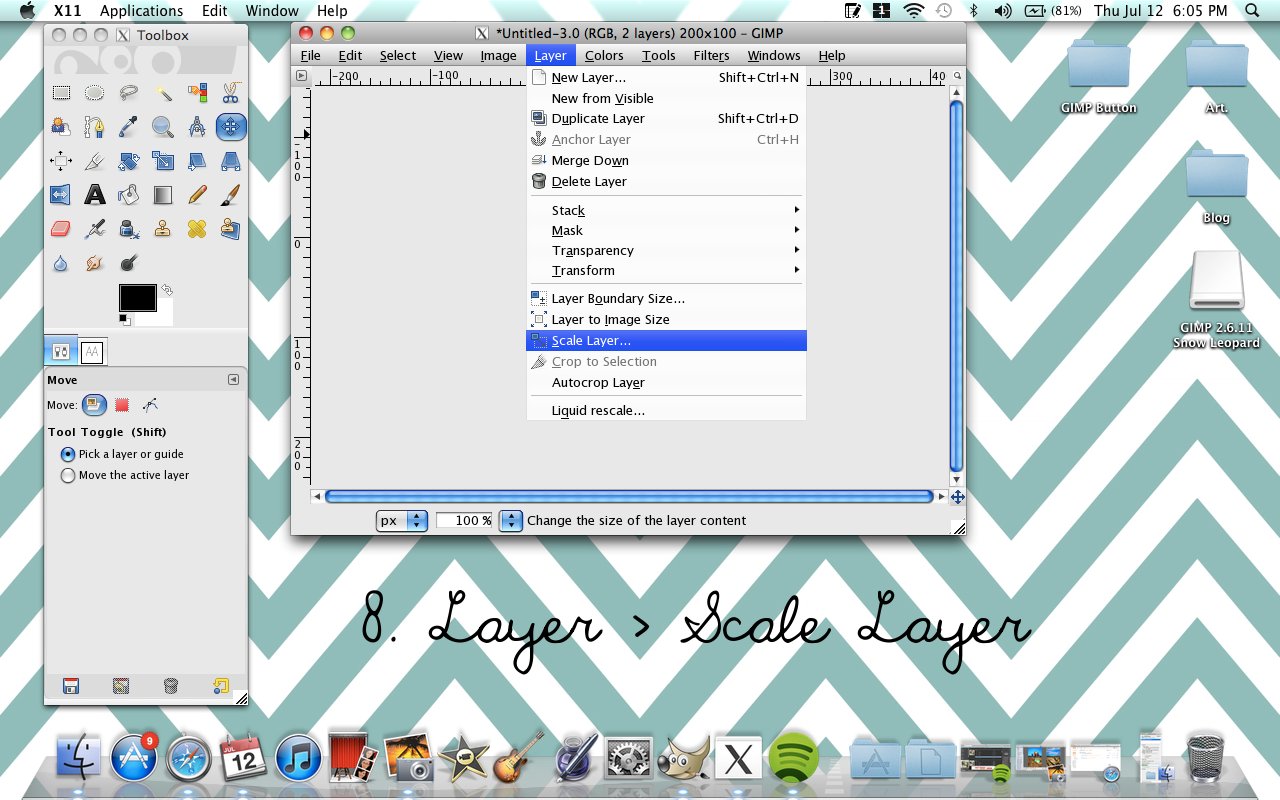
It really is very easy and quick! I have made a ton of different buttons and each time they get better and better! and I always have fun creating them. Don't forget that you can always add more elements to your button like clipart, cutouts, and designs. I put the imaginary "Adventurous" blog button up on my site just to see how it looks.

Does it follow the rules?
1. Lost in the crowd? No it is easy to see!
2. Simple? Yes!
3. Is it interesting? Yeah!
4. Is it me? Well this doesn't really apply since it is an imaginary blog button...
If you have any questions/comments please feel free to comment/email me! If there is anything that you want to learn how to do on Gimp please let me know! I am taking tutorial requests. As I have said before, in my previous GIMP tutorial posts, I am not at all an expert! I am still learning too!
I would love to see what you create! or better yet let's swap buttons! I would love to support your blog! Just send me an email at carli.randolf@gmail.com
Carli
P.S. You can download GIMP (a free photo editing software) HERE. You can see my other GIMP tutorials on resizing and cropping images or adding text.
Such a handy post! And it came at a funny time because I just tried re-working my buttons in Gimp the other night! Something that was driving me mad the whole time was that a little anchor kept popping up and I couldn't get rid of it. Any idea what was going on there?
ReplyDeleteI am so glad! and by the way your new buttons look great! Hmm. I am not sure what that is. I know that you can anchor layers to the image, but I have never had it keep popping up. That's really weird. I'm sorry I don't know what is going on there. :(
Delete